

- Ongoing connections → Integrations
- Quick uploads → Import transactions (top-right)
- Full lifecycle → How data enters ClearSpend
How it works
1
2
Connect invoices and receipts
Gmail, Google Drive, or upload and forward from the Import transactions menu. These syncs pull proof only.
3
ClearSpend matches
Each charge is linked to the right invoice or receipt automatically.
4
Request what’s missing
When proof is missing, request an invoice from the owner.
Dashboard totals come from transactions, not invoices alone. Invoices are proof until they match a charge.
Transaction sources
These create charges that power matching, KPIs, and reconciliation.
When reconciliation is done, you can also push matched data and supporting documents back to Xero.
Document sources
These sync invoices and receipts as proof for each charge. They do not create spend totals on their own.
Also supported: Slack file uploads and the Chrome extension.
Import transactions menu
Use the Import transactions button for the connections and uploads you need most often.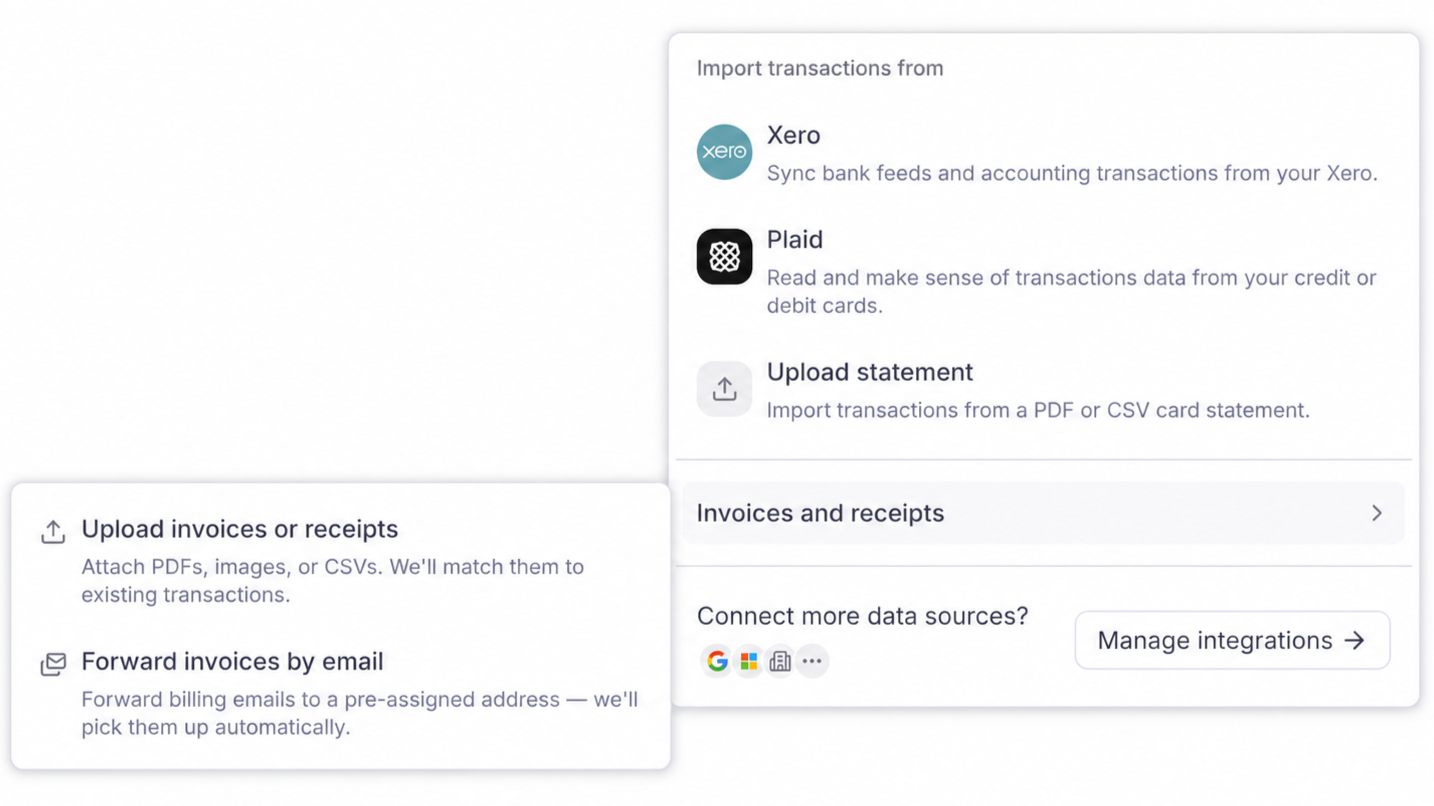
Import transactions menu: connect Xero or Plaid, upload a statement, add invoices, or open Integrations.
Import transactions from
When you upload a statement, choose a Transaction bucket so the extracted charges land in the right group. Use Manage buckets in that dropdown if you need a new one.
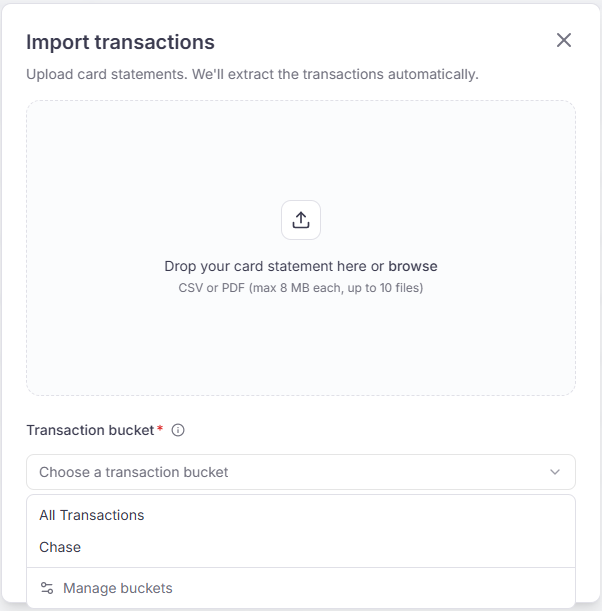
Import transactions: upload a statement and choose a transaction bucket.
Invoices and receipts
Connect more data sources?
Not sure where to start? See Choosing integrations. File limits are in Limits and formats.
Managing buckets
A bucket groups transactions, usually one per bank or card account. Every workspace starts with All Transactions. Charges with no other bucket land there. When you connect Xero, each bank account can be linked to only one bucket.Create a bucket
1
Open a bucket picker
On Transactions, when connecting Xero, or when uploading a statement, open the bucket dropdown.
2
Open Manage buckets
Click Manage buckets at the bottom of the list. The Transaction Buckets drawer opens.
3
Create a bucket
Click Create a bucket, name it (for example Chase or AmEx), and save.
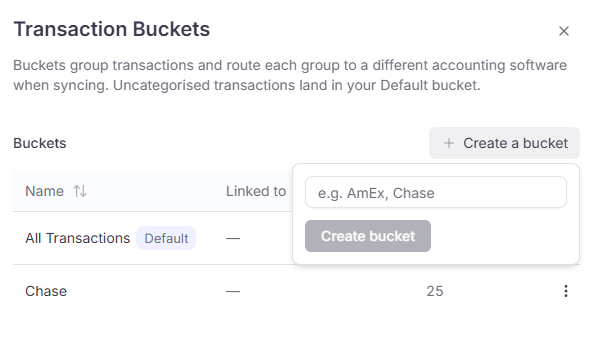
Transaction Buckets: create a bucket, see which accounts are linked, and rename or delete.