

Where data comes from
WhatsApp collects proof from your phone. It does not parse bank or card statements into charges.
Import transactions
The Import transactions button (top-right) is the shortcut for bringing data in without leaving the page you are on.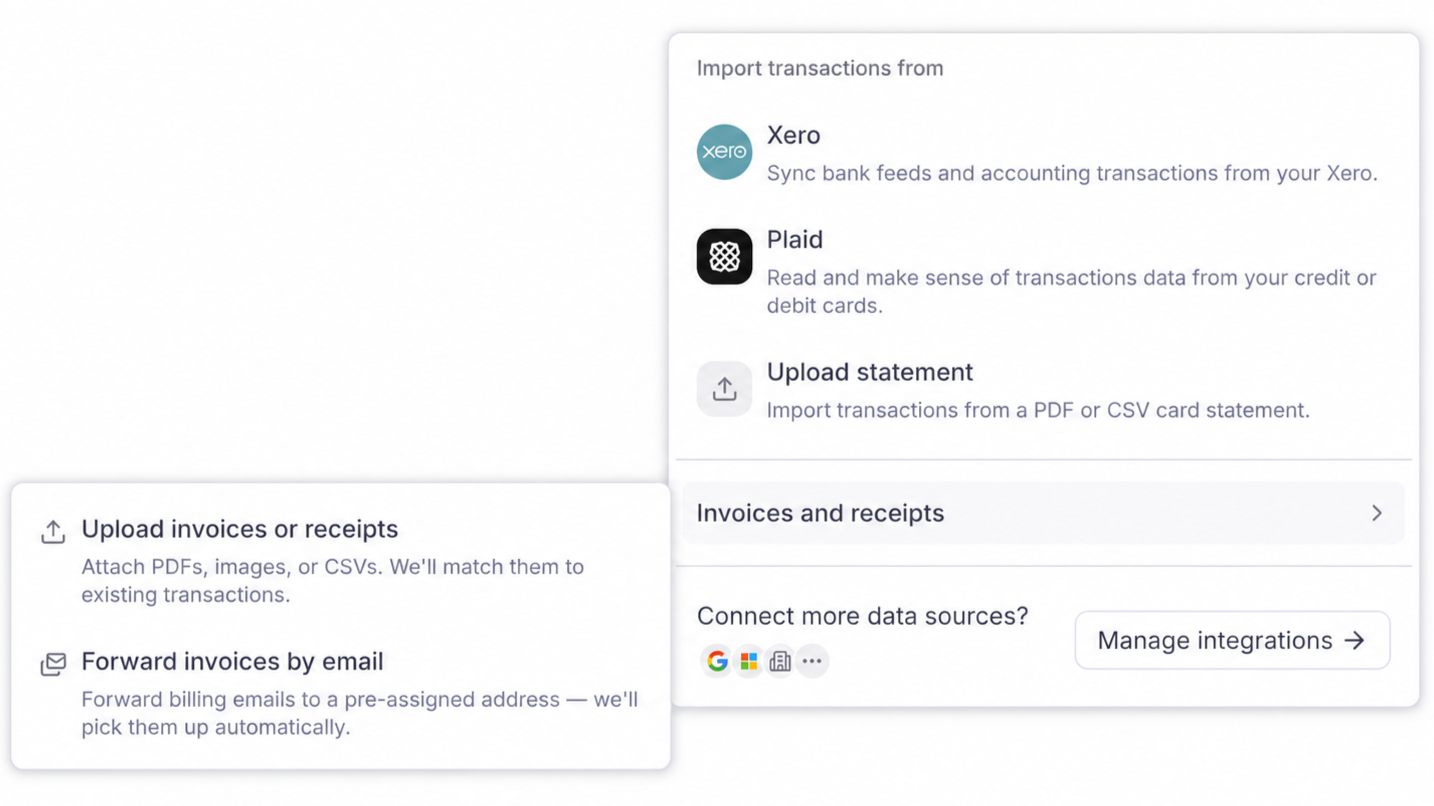
Import transactions menu: connect Xero or Plaid, upload a statement, add invoices, or open Integrations.
Import transactions from
Invoices and receipts
Connect more data sources?
Other entry paths
What each layer contributes
- Transactions: what was paid. From Plaid, Xero → ClearSpend, or statement uploads. These drive matching, dashboard totals, and reconciliation.
- Documents: invoices and receipts. From Gmail, Drive, Slack, WhatsApp, and uploads. They are proof. They do not add spend on their own.
- Subscriptions: ownership and upcoming renewals, after spend is in the workspace.
Quick decision guide
Managing buckets
A bucket groups transactions in ClearSpend, usually one per bank or card account. Every workspace starts with All Transactions. Each Xero bank account can be linked to only one bucket. Create a bucket for each account before you connect. When you upload a statement, choose a Transaction bucket so the extracted charges land in the right group.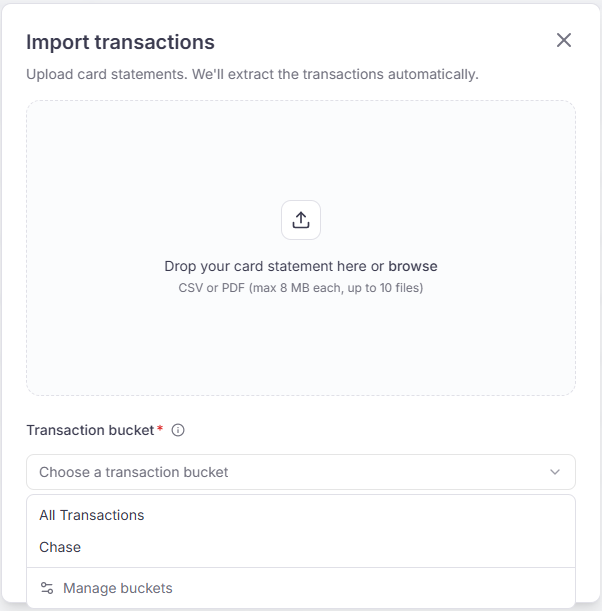
Import transactions: upload a statement and choose a transaction bucket.
1
Open a bucket picker
On Transactions, when connecting Xero, or when uploading a statement, open the bucket dropdown.
2
Open Manage buckets
Click Manage buckets. The Transaction Buckets drawer opens.
3
Create, rename, or delete
Click Create a bucket to add one. Use the row menu to rename, or to delete a bucket you created. All Transactions cannot be deleted.
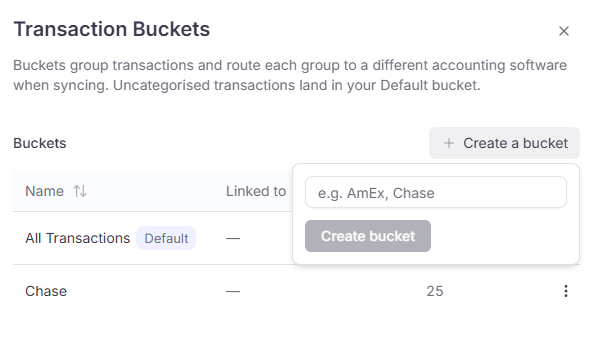
Transaction Buckets: create a bucket, see which accounts are linked, and rename or delete.
Related
- Import transactions: each menu item and managing buckets
- Transactions: match charges to proof
- Dashboard: what counts in KPI widgets